-
In Appointment Manager, click the small gear icon to be taken to your Availability Settings.
-
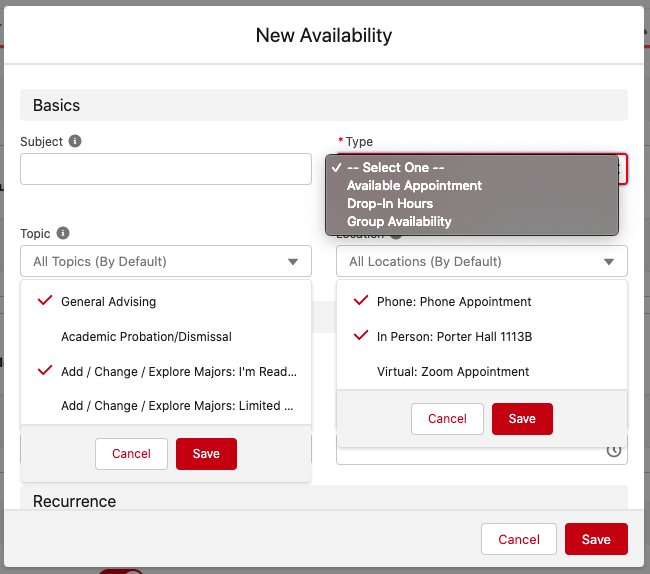
In your Availability Settings, either edit an existing Availability or create a new one to be presented with the “Edit/New Availability” window. The way you create or edit Availability has not changed. The “Edit/New Availability” window will look something like the image below. Keep in mind that you are able to multi-select different options.
-
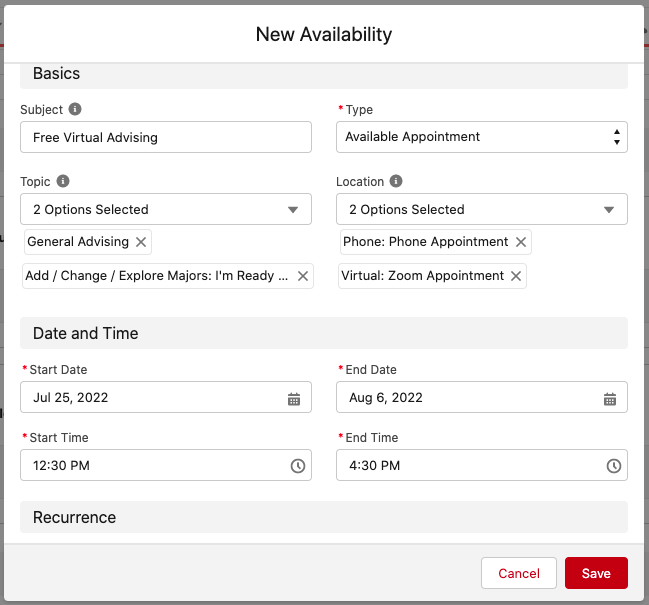
Subject - the subject of an Availability can be anything you want it to be. Note that having the word “FREE” appear anywhere in the subject will mean that your advising blocks will be treated as “free” in your Google Calendar (if you are using calendar sync). Example Subject: Free In-person Advising.
-
Topic - here you can select what you want the topic of appointments under this Availability to be. Be sure to click Save in the drop-down menu after making a selection.
-
Location - you are able to designate where you want appointments under this Availability to be. You are able to multi-select more than one location. Be sure to click Save in the dropdown menu after making a selection. You can add to this menu by adding an appointment location in Availability Settings.
-
The other options in this window should be completed according to when you want the Availability to be.
-
Once this window is complete, click Save. Once completed, the window will look something like the image below.
Last updated on
Sep 26, 2022