Instructions for Advisors
-
Create and save an Advising Note using the instructions found in the Creating, Sending, and Editing a Note section.
-
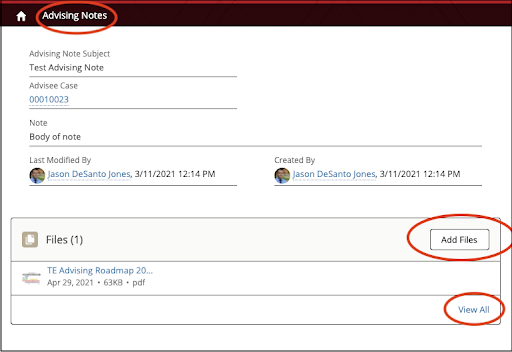
Open an Advising Note (if not already open).
-
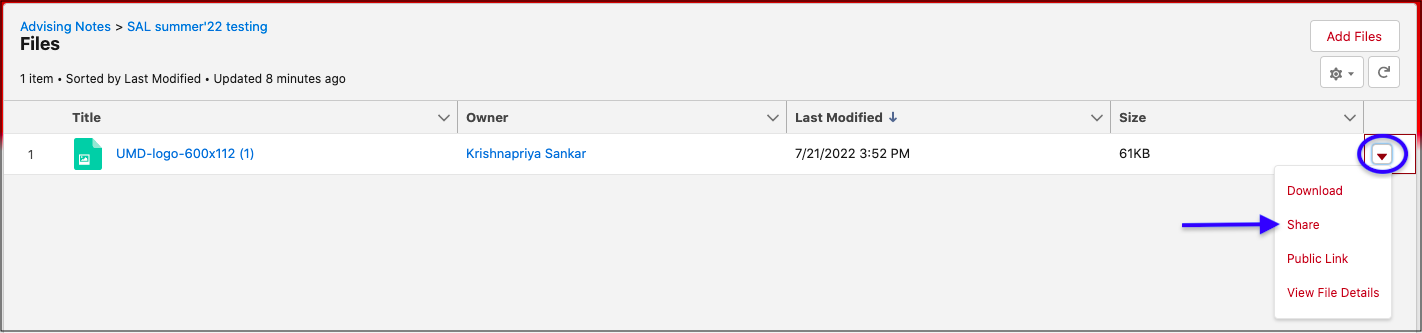
On the right side of the screen, you can either upload a file or drag/drop a file. You may also select Add File if you have previously uploaded the file to TE. Once uploaded here, the file is viewable to all advisors, but is, by default, NOT visible to students.
- To share with students, click View all just below the file icon and select Share from the drop-down arrow on the far-right side of the screen (see below).
-
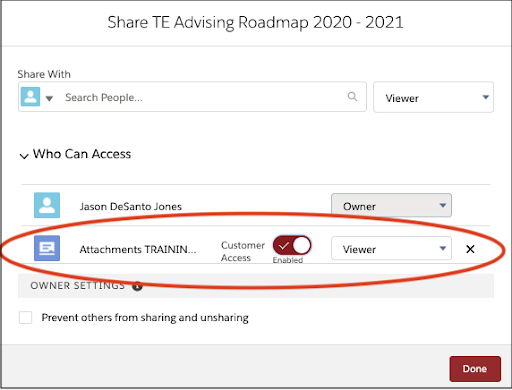
Expand the window that appears by clicking Who Can Access. Toggle the Customer Access button to “Enabled.” Click Done. The file is now visible to the student.
-
On the screens referenced above, you may also delete a file, upload a new version, or toggle "Customer Access" to disabled.
-
The “Search People” field has no utility. You can share a file with another advisor, but since they are shared by default, there is no need to use it.
-
Only the user who uploaded the file can manage sharing or deletion.
Instructions for Students
- From the Student Portal, students click Advising Notes at the top of the screen. They can click Add Files to simply upload a file.
- Alternatively, they may click View All to see additional options (e.g., download, delete, etc.).
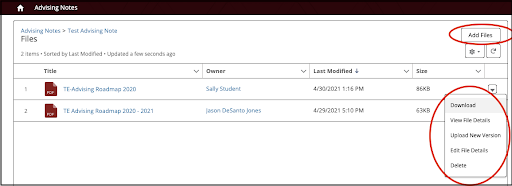
- Students may only delete files they have uploaded themselves.