There are 2 ways that advisors can cancel or reschedule an appointment; through Appointment Manager or through an Advising Case. Please note that deleting the appointment directly from your UMD or TerpEngage Calendar does not actually cancel the advising appointment itself (which means the student will not be notified).
Through Appointment Manager:
-
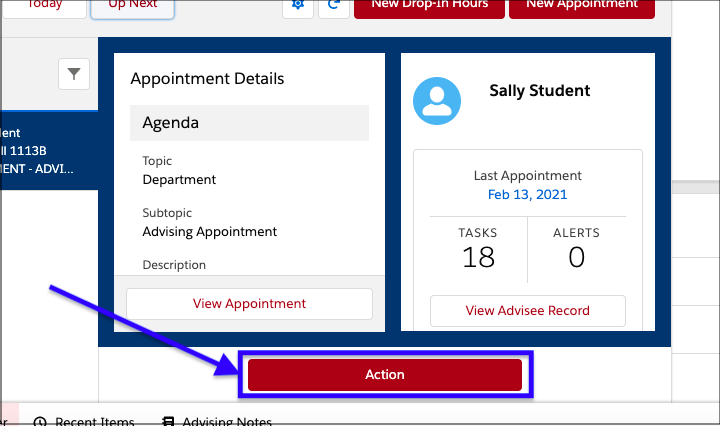
Open Appointment Manager by clicking Appointment Manager in the lower-left corner of the screen.
-
Find the appointment you would like to cancel or reschedule using the blue calendar and date selector arrows.
-
Click on the appointment.
-
Click the red Action button shown in the image below.
-
To cancel the appointment:
-
Click Cancel Appointment.
-
Add an optional comment about the reason for cancellation.
-
Click Cancel It to finish canceling the appointment. You can click Never Mind to exit the cancellation screen without canceling the appointment.
-
-
To reschedule or edit the appointment:
-
Click Edit Appointment.
-
Click Save once you have made the necessary changes.
-
Through an Advising Case Record:
-
You must first access the Advising Case of a student attendee by searching their name in the search bar at the top of the screen and clicking the result with the Advising Case icon,
 , attached.
 -
Find the appointment you would like to cancel or reschedule. All of the student’s upcoming appointments are shown under the "Upcoming Appointments" heading.
-
Click the topic of the appointment to open it.
-
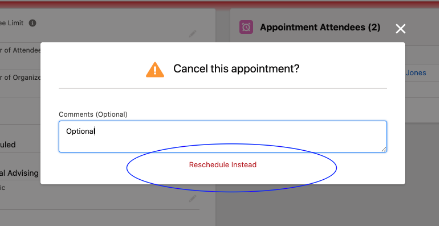
Click Cancel Appointment.
-
Indicate an optional reason and click Cancel It or select Reschedule Instead to return to the scheduling window.
How to Cancel Another Advisor's Appointment
-
You must first open the Advising Case of a student attendee by searching their name in the search bar at the top of the screen and clicking the result with the Advising Case icon,
 , attached.
 -
Find the appointment you would like to cancel or reschedule. All of the student’s upcoming appointments are shown under the “Upcoming Appointments” heading in the middle of the page.
-
Click the topic of the appointment to open it.
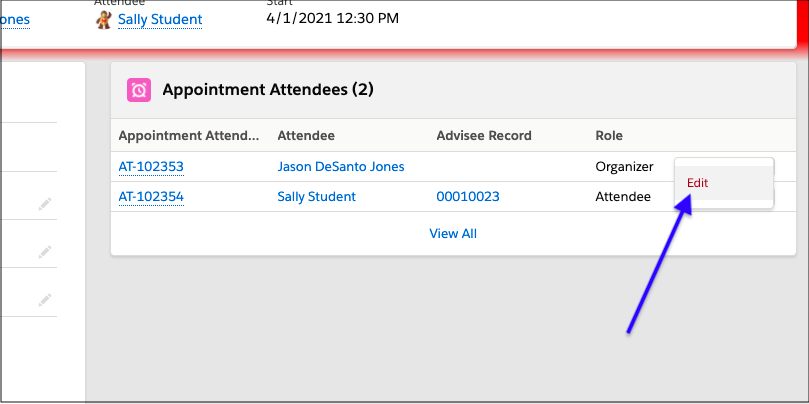
- Click the down arrow corresponding to any of the appointment attendees under the “Appointment Attendees” heading followed by the Edit button that will appear.
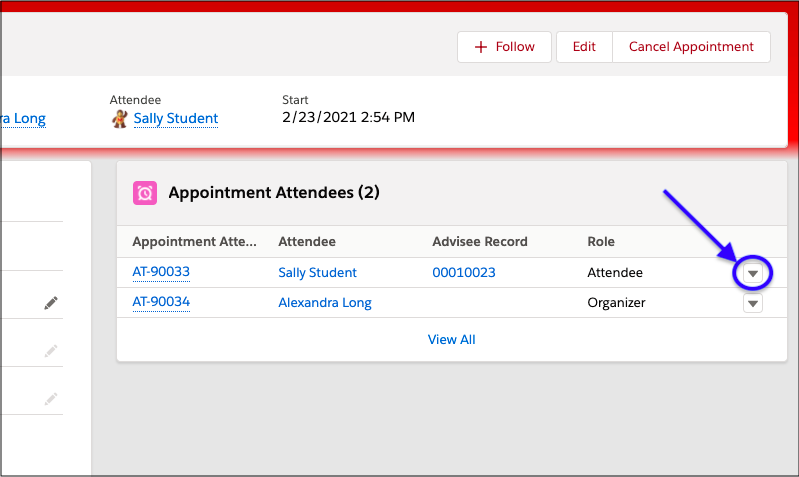
- Click the Edit button that appears.
-
In the Status drop down menu, select “Canceled” to change the status of the appointment to canceled.
-
Click Save.
-
You have now canceled the appointment. The student will receive an email confirmation about the cancellation and the appointment will be moved to “Canceled” in both the student and advisor view. Remember to refresh your browser if you do not see that the appointment has been moved.
Where to View Canceled Appointments
-
Open a students Advising Case by searching their name in the search bar at the top of the screen and clicking the result with the Advising Case icon,
 , attached.
 -
All of the student’s appointments are shown in this “Appointments” tab in the middle window.
-
Scroll down in the middle window until the “Canceled Appointments” heading appears.
-
A preview of the student’s canceled appointments appear here. You can click the topic of an appointment to open it or click View All to view all canceled appointments for the student.