How to Create a New Appointment
There are 3 ways for an advisor to create an appointment: through a student’s Advising Case, through the Appointment Manager, or through the Appointment Scheduler on the Home Page. It is recommended that you schedule appointments through an Advising Case because you will not have to search for the advisee in the New Appointment window.
To Schedule Through an Advising Case:
-
You must first access the Advising Case of a student you would like to schedule with by searching their name in the search bar at the very top of the screen and clicking the result with the Advising Case icon,
 , attached.
 -
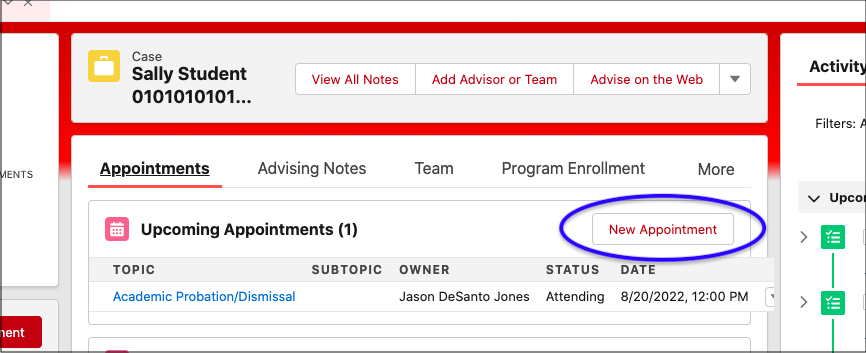
Click New Appointment. You can also click New Appointment in the "Appointment Scheduler" tile found on the left side of a student's Advising Case. Note that if you schedule through Appointment Scheduler, you will have to search for the student you would like to meet with. This is the same "Appointment Scheduler" tile found on the Home Page, and more information about it can be found in the sections below.
-
Select the location of the appointment from the Location drop-down menu.
-
This menu is populated by the locations designated in your Availability settings. Information about all Availability settings can be found in the overview of appointment settings.
-
A note about virtual appointments: If doing virtual advising, it is suggested that you add virtual appointments as an appointment location according to the information about location settings in the appointment location section instead of assigning each meeting a unique link. If you are assigning each appointment its own virtual meeting link, click the Web Meeting checkbox and paste the unique meeting link in the Web Meeting Link textbox.
-
-
Select a topic from the Topic drop-down menu.
-
Select a subtopic from the Subtopic drop-down menu (if this option is available).
-
Enter an appropriate appointment subject and description.
-
Under the “Date and Time” heading, you can select Predefined Availability (which looks only at the hours you have already made available) or One-Off Availability (which ignores all Availability configuration and related settings). If you choose One-Off Availability, you’ll be able to schedule a last-minute appointment for any length you choose.
-
To schedule through Predefined Availability:
-
Click on the days of the calendar to see a list of available time slots for that day appear to the right of the calendar.
-
You can also click the First Available button to populate a list of your first available time slots.
-
Select a time slot from the list by clicking on the bubble that corresponds to it. Continue to step 8.
-
-
To schedule a One-Off Appointment:
-
Click One-Off Appointment under the “Date and Time” heading.
-
Select what you would like the start and end dates and times to be.
-
-
-
Click Save at the bottom of the screen to create the appointment.
To Schedule Through Appointment Manager:
-
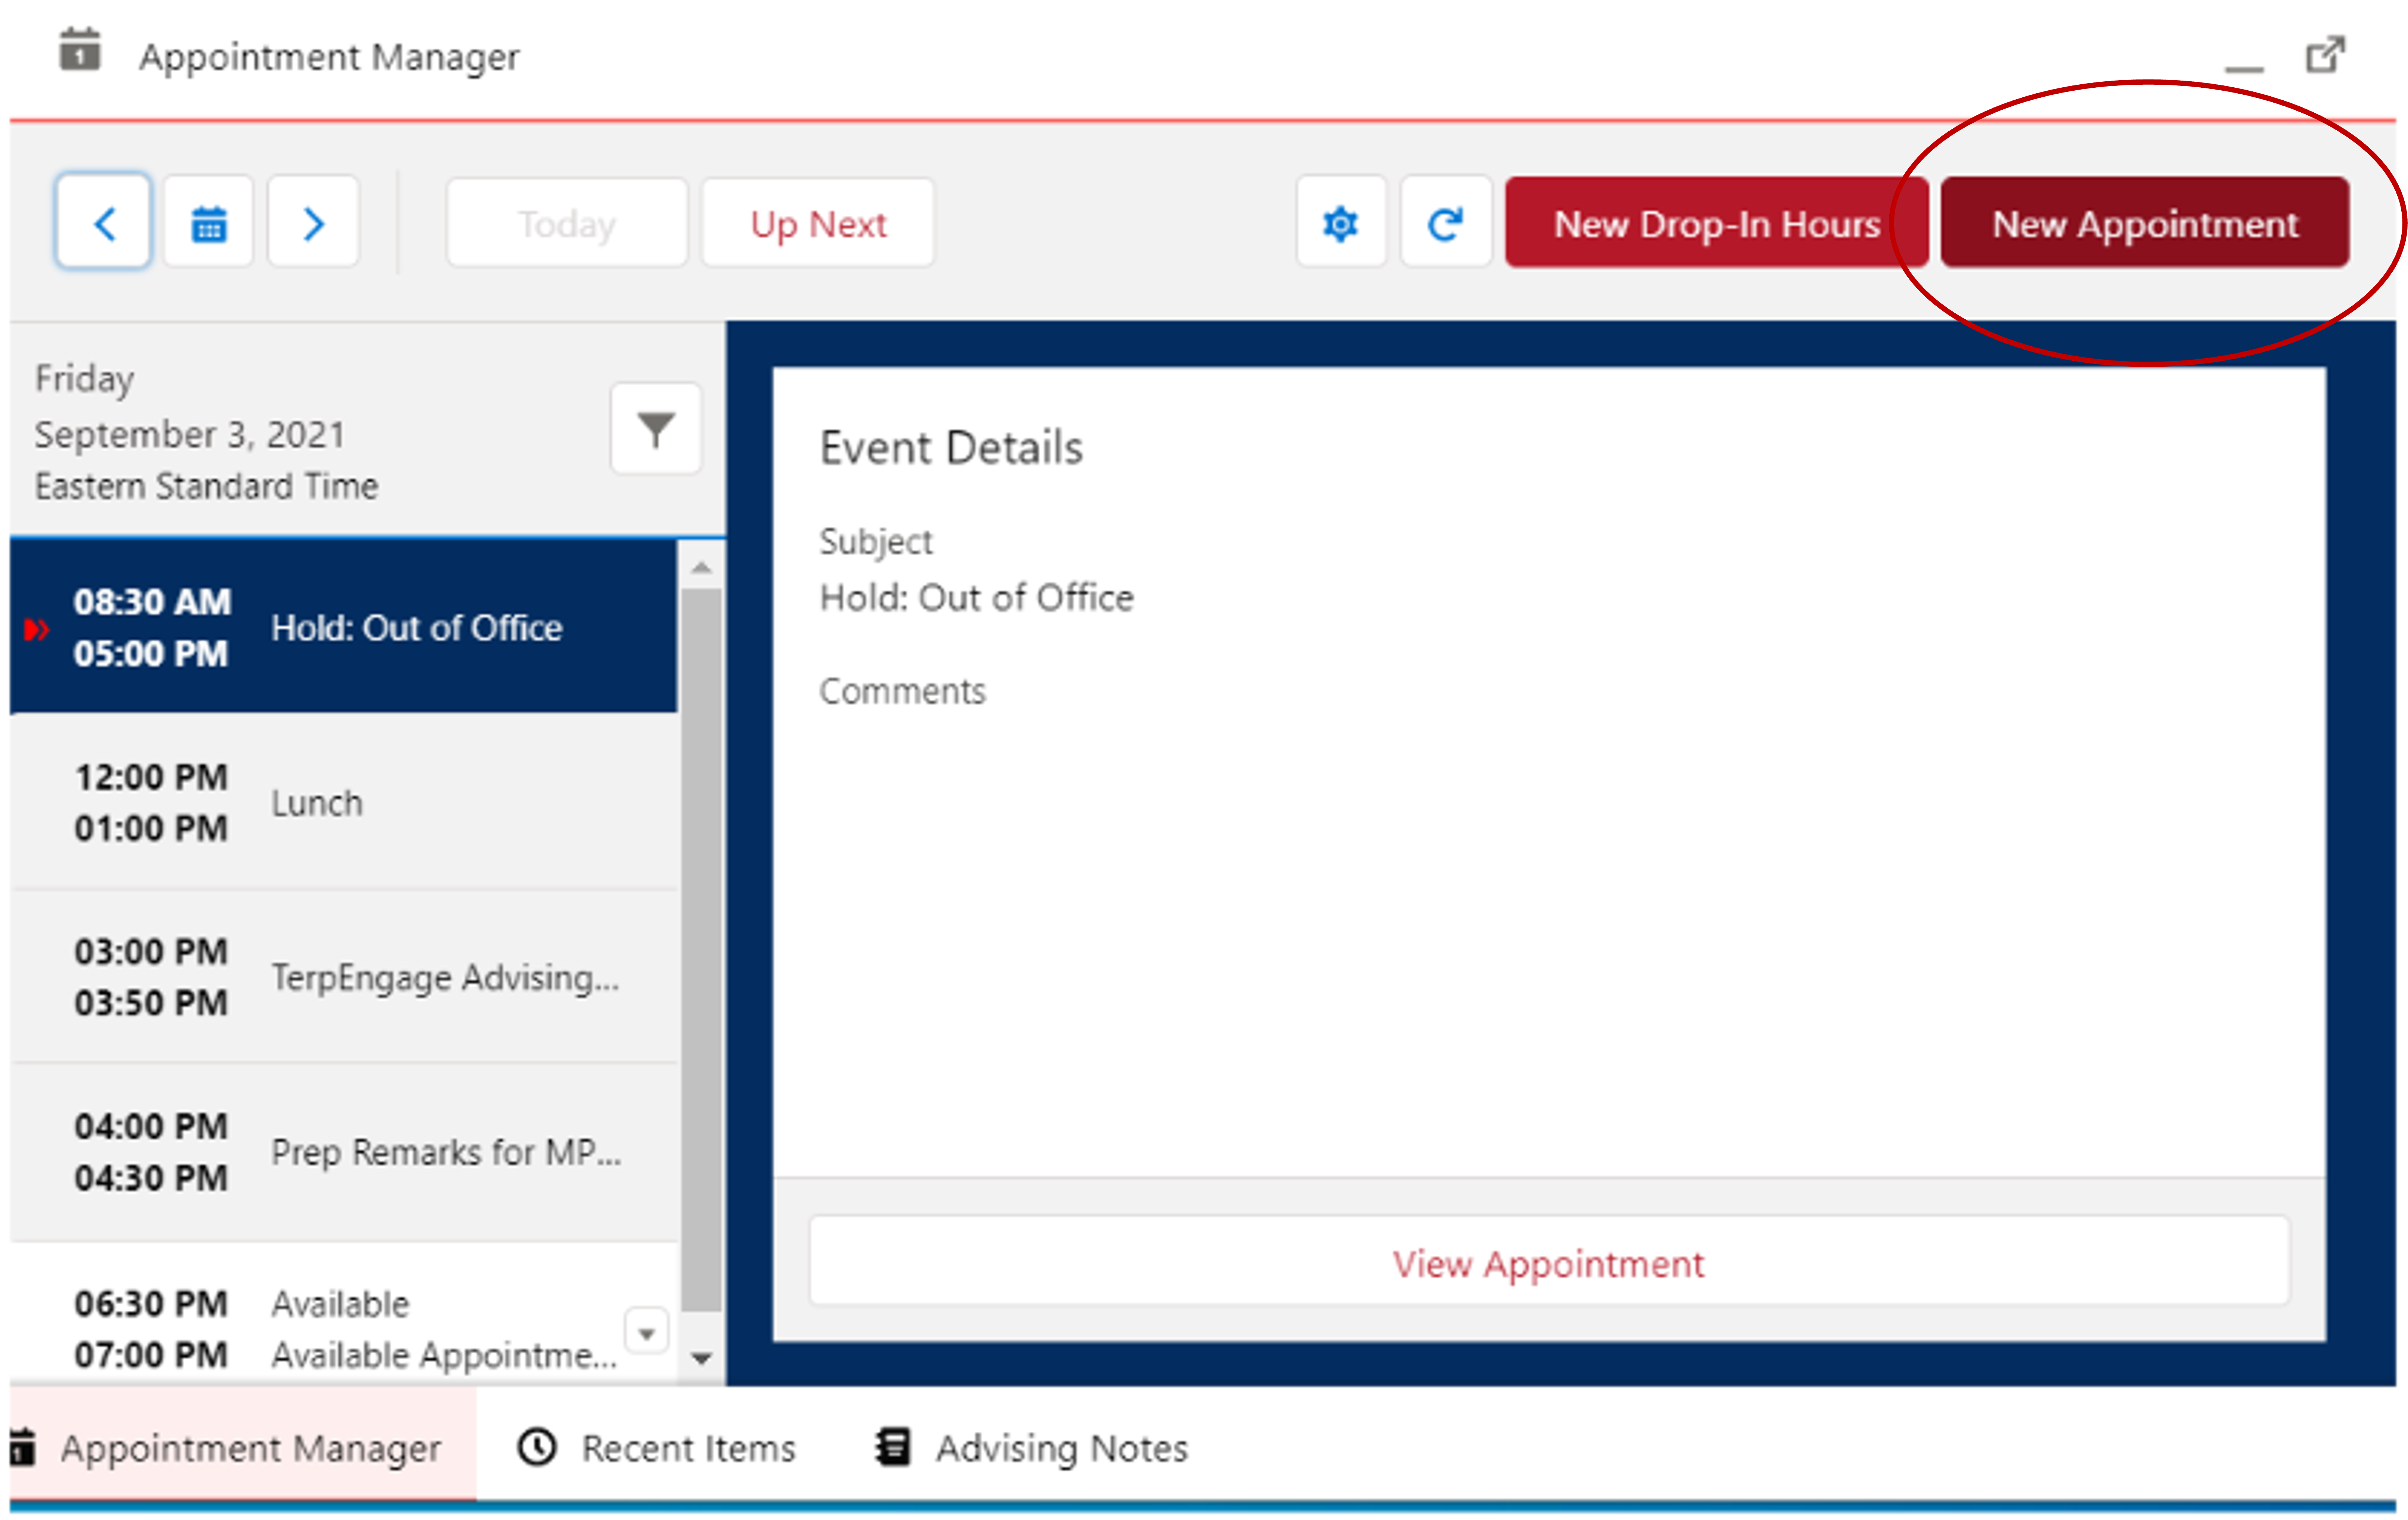
Click Appointment Manager in the lower-left corner of your screen.
-
Click New Appointment in the upper-right corner of the window that appears.
-
Search for and select the name of the advisee you would like to schedule an appointment with in the Invitee(s) field.
-
Select the location of the appointment from the Location drop-down menu.
-
This menu is populated by the locations designated in your Availability settings. Information about all Availability settings can be found in the overview of appointment settings.
-
A note about virtual appointments: If doing virtual advising, it is suggested that you add virtual appointments as an appointment location option according to the section about appointment location settings here, instead of assigning each meeting a unique link. If you are assigning each appointment its own virtual meeting link, click the Web Meeting checkbox and paste the unique meeting link in the Web Meeting Link textbox.
-
-
Select a topic from the Topic drop-down menu.
-
Select a subtopic from the Subtopic drop-down menu.
-
Enter an appropriate appointment subject and description.
-
Under the “Date and Time” heading, you can select Predefined Availability (which looks only at the hours you have already made available) or One-Off Availability (which ignores all Availability configuration and related settings). If you choose One-Off Availability, you’ll be able to schedule a last-minute appointment for any length you choose.
-
To schedule through Predefined Availability:
-
Click on the days of the calendar to see a list of available time slots for that day appear to the right of the calendar.
-
You can also click the First Available button to populate a list of your first available time slots.
-
Select a time slot from the list by clicking on the bubble that corresponds to it. Continue to step 9.
-
-
To schedule a One-Off Appointment:
-
Click One-Off Appointment under the “Date and Time” heading.
-
Select what you would like the start and end dates and times to be.
-
-
-
Click Save at the bottom of the screen to create the appointment.
To Schedule Through Appointment Scheduler on the Home Page:
-
Navigate to the Home Page from the main drop-down menu.
-
Click Appointment Scheduler.

-
Search / select advisor or team under “Assigned Support Staff Member.”
-
Search / select student Invitee (search by name, UID, or email).
-
Select a Topic.
-
Write an optional Description.
-
Select Date, Time slot, and Location.
-
Note: The One-Off option is not available here.
-
Use the First Available option to search within a 7-day window.
-
-
Click Save.
How to Create Group Appointment Availability
Group appointments are available for advisors who wish to meet with multiple students simultaneously.
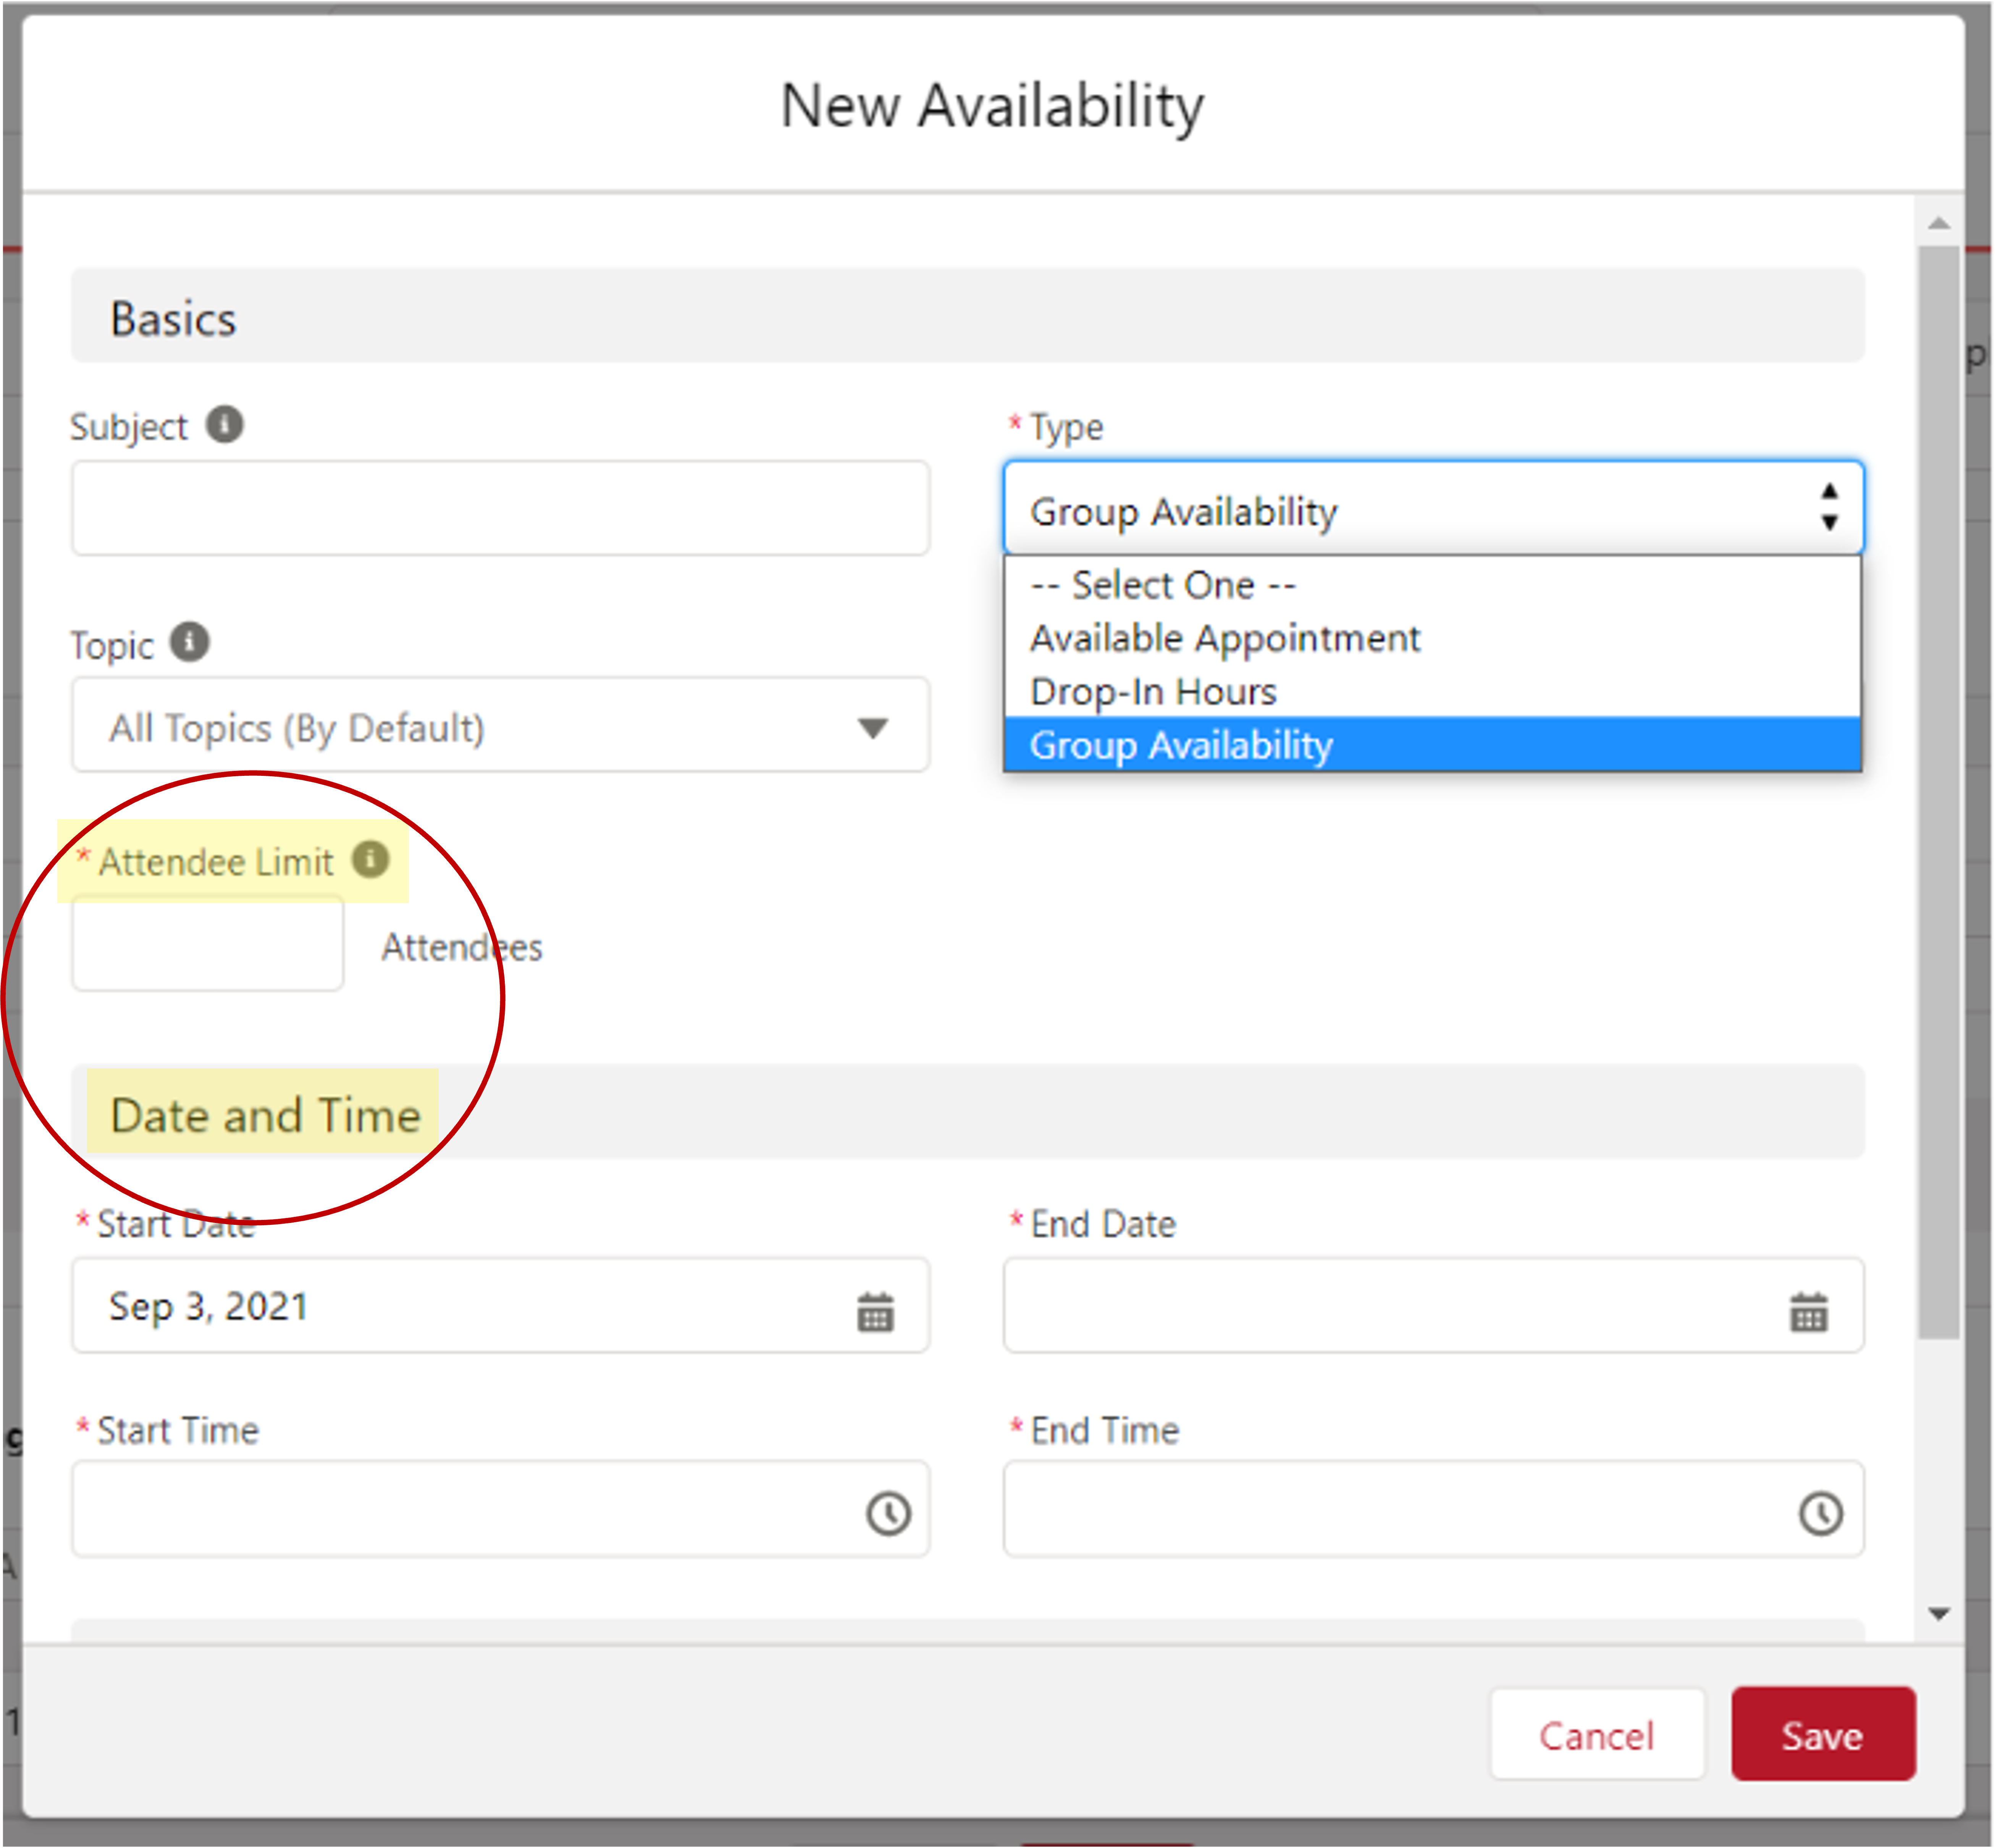
The process of creating this availability is similar to the process of creating recurring availability for individual appointments. For the appointment availability type, select Group Availability.
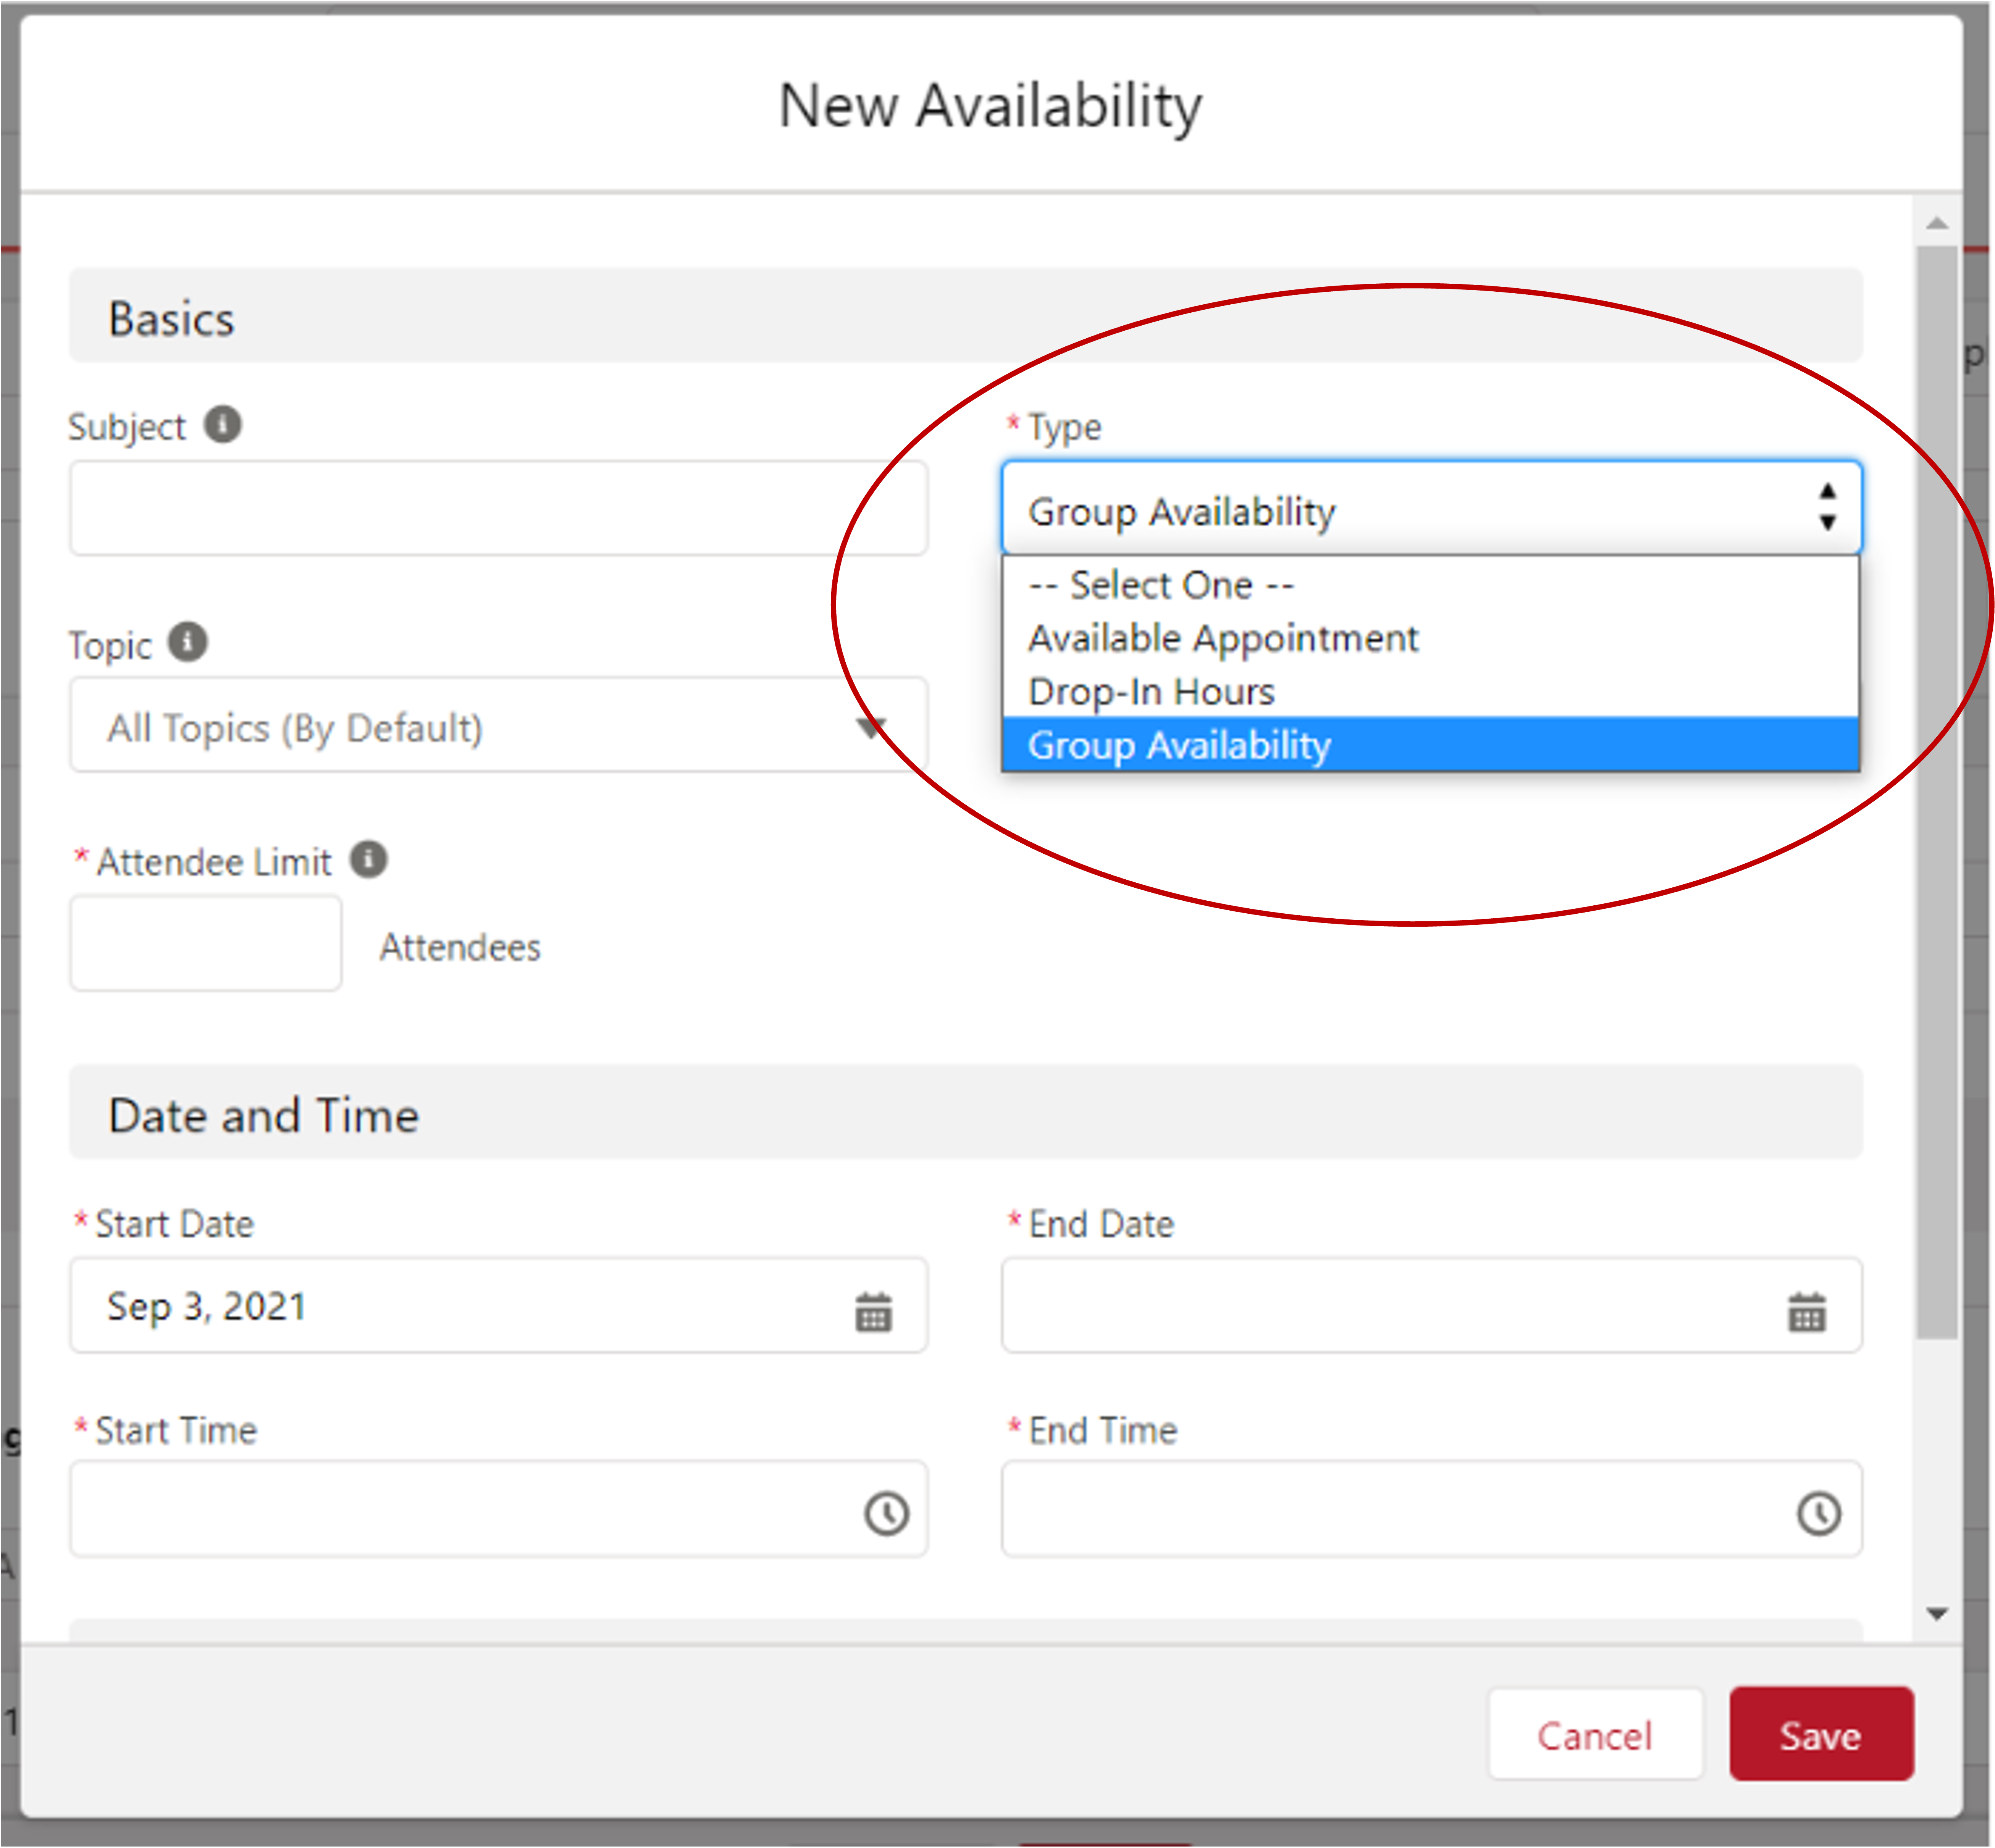
Afterward, enter a number for your desired Attendee Limit, and select your desired Date(s) and Time(s).
How to View, Edit, or Cancel a Group Appointment
If the First Student Has Not Been Scheduled
There is currently no way for an advisor to schedule the first student into a an existing group appointment. Instead, that student musch schedule themselves through the Community.
However, advisors may schedule the first student into a new appointment that does not already have other students during the process of creating a new group appointment and selecting New Appointment using the Appointment Manager.
How to View a Group Appointment Once the First Student Has Been Scheduled
There are several ways that advisors can access and view existing group appointments - through the Appointment Page, through the Appointment Manager, or via that Appointment Information on an advisee attendee's case. Please note that your UMD or TerpEngage calendar will not show the UID's or names for all attendees.
View Through the Appointment Page
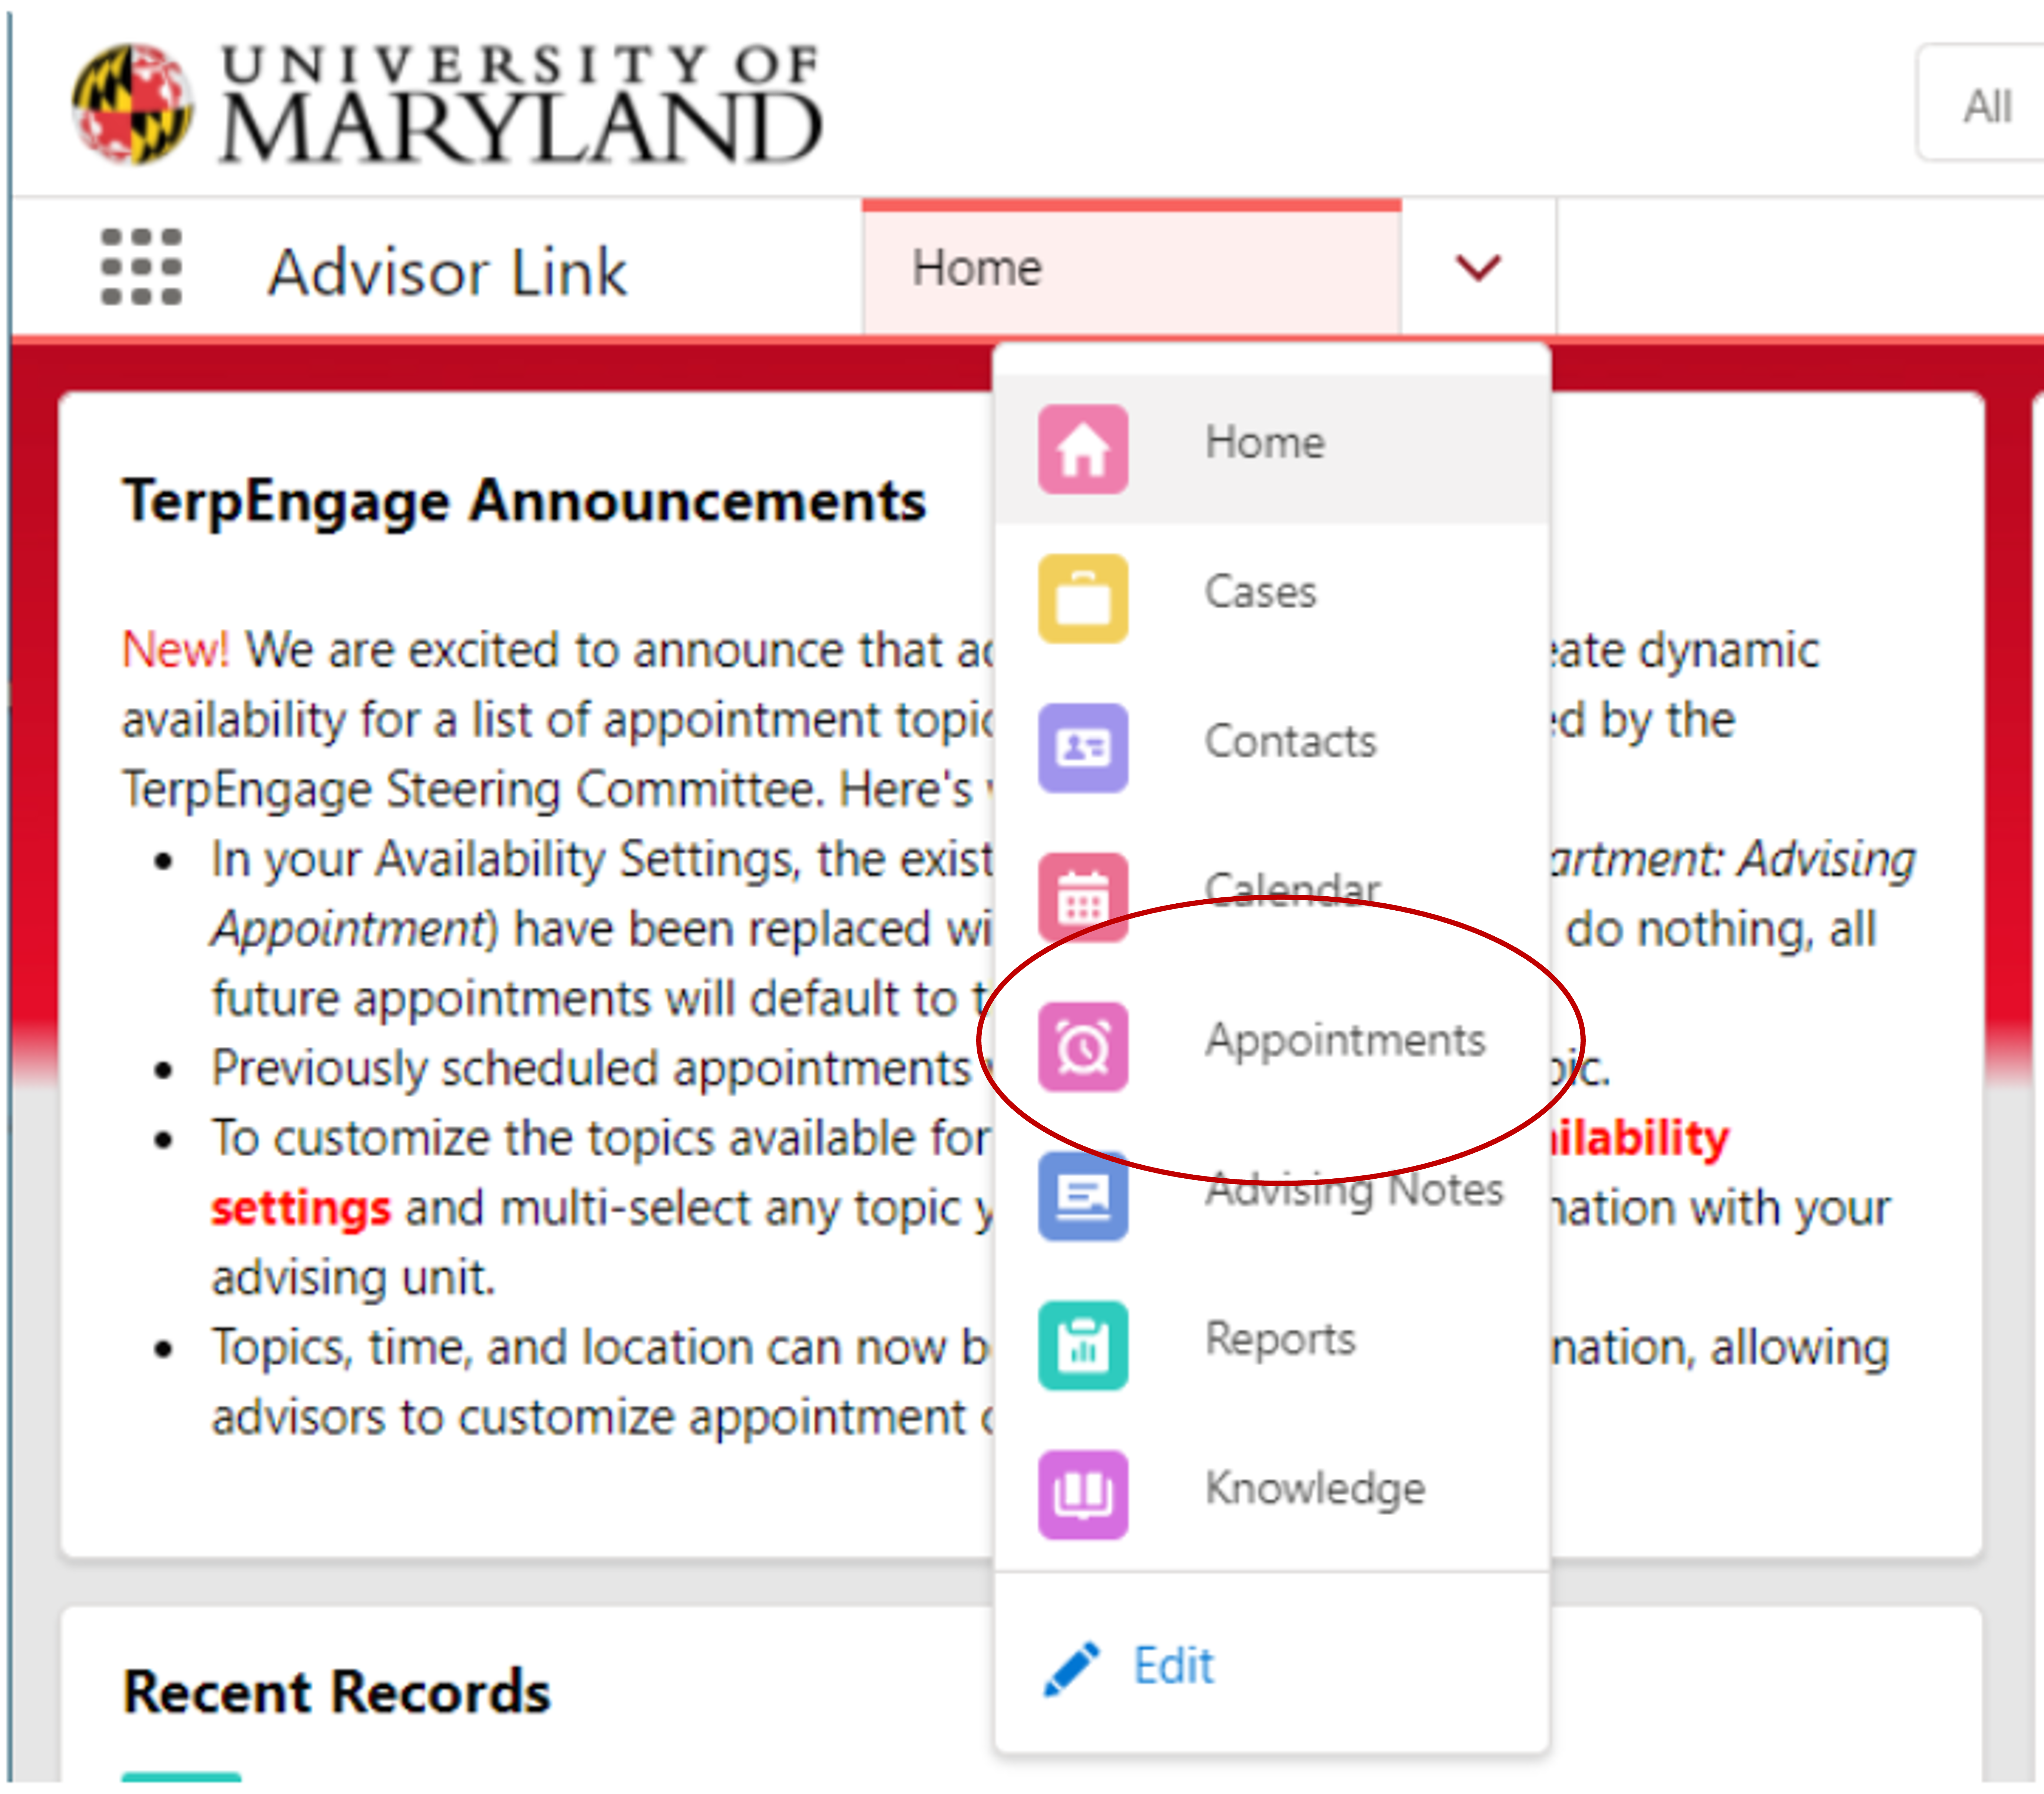
Toward the top left of the TerpEngage screen, there is a downward-facing arrow near Advisor Link. Select that arrow to open a drop-down menu from which you can select Appointments.
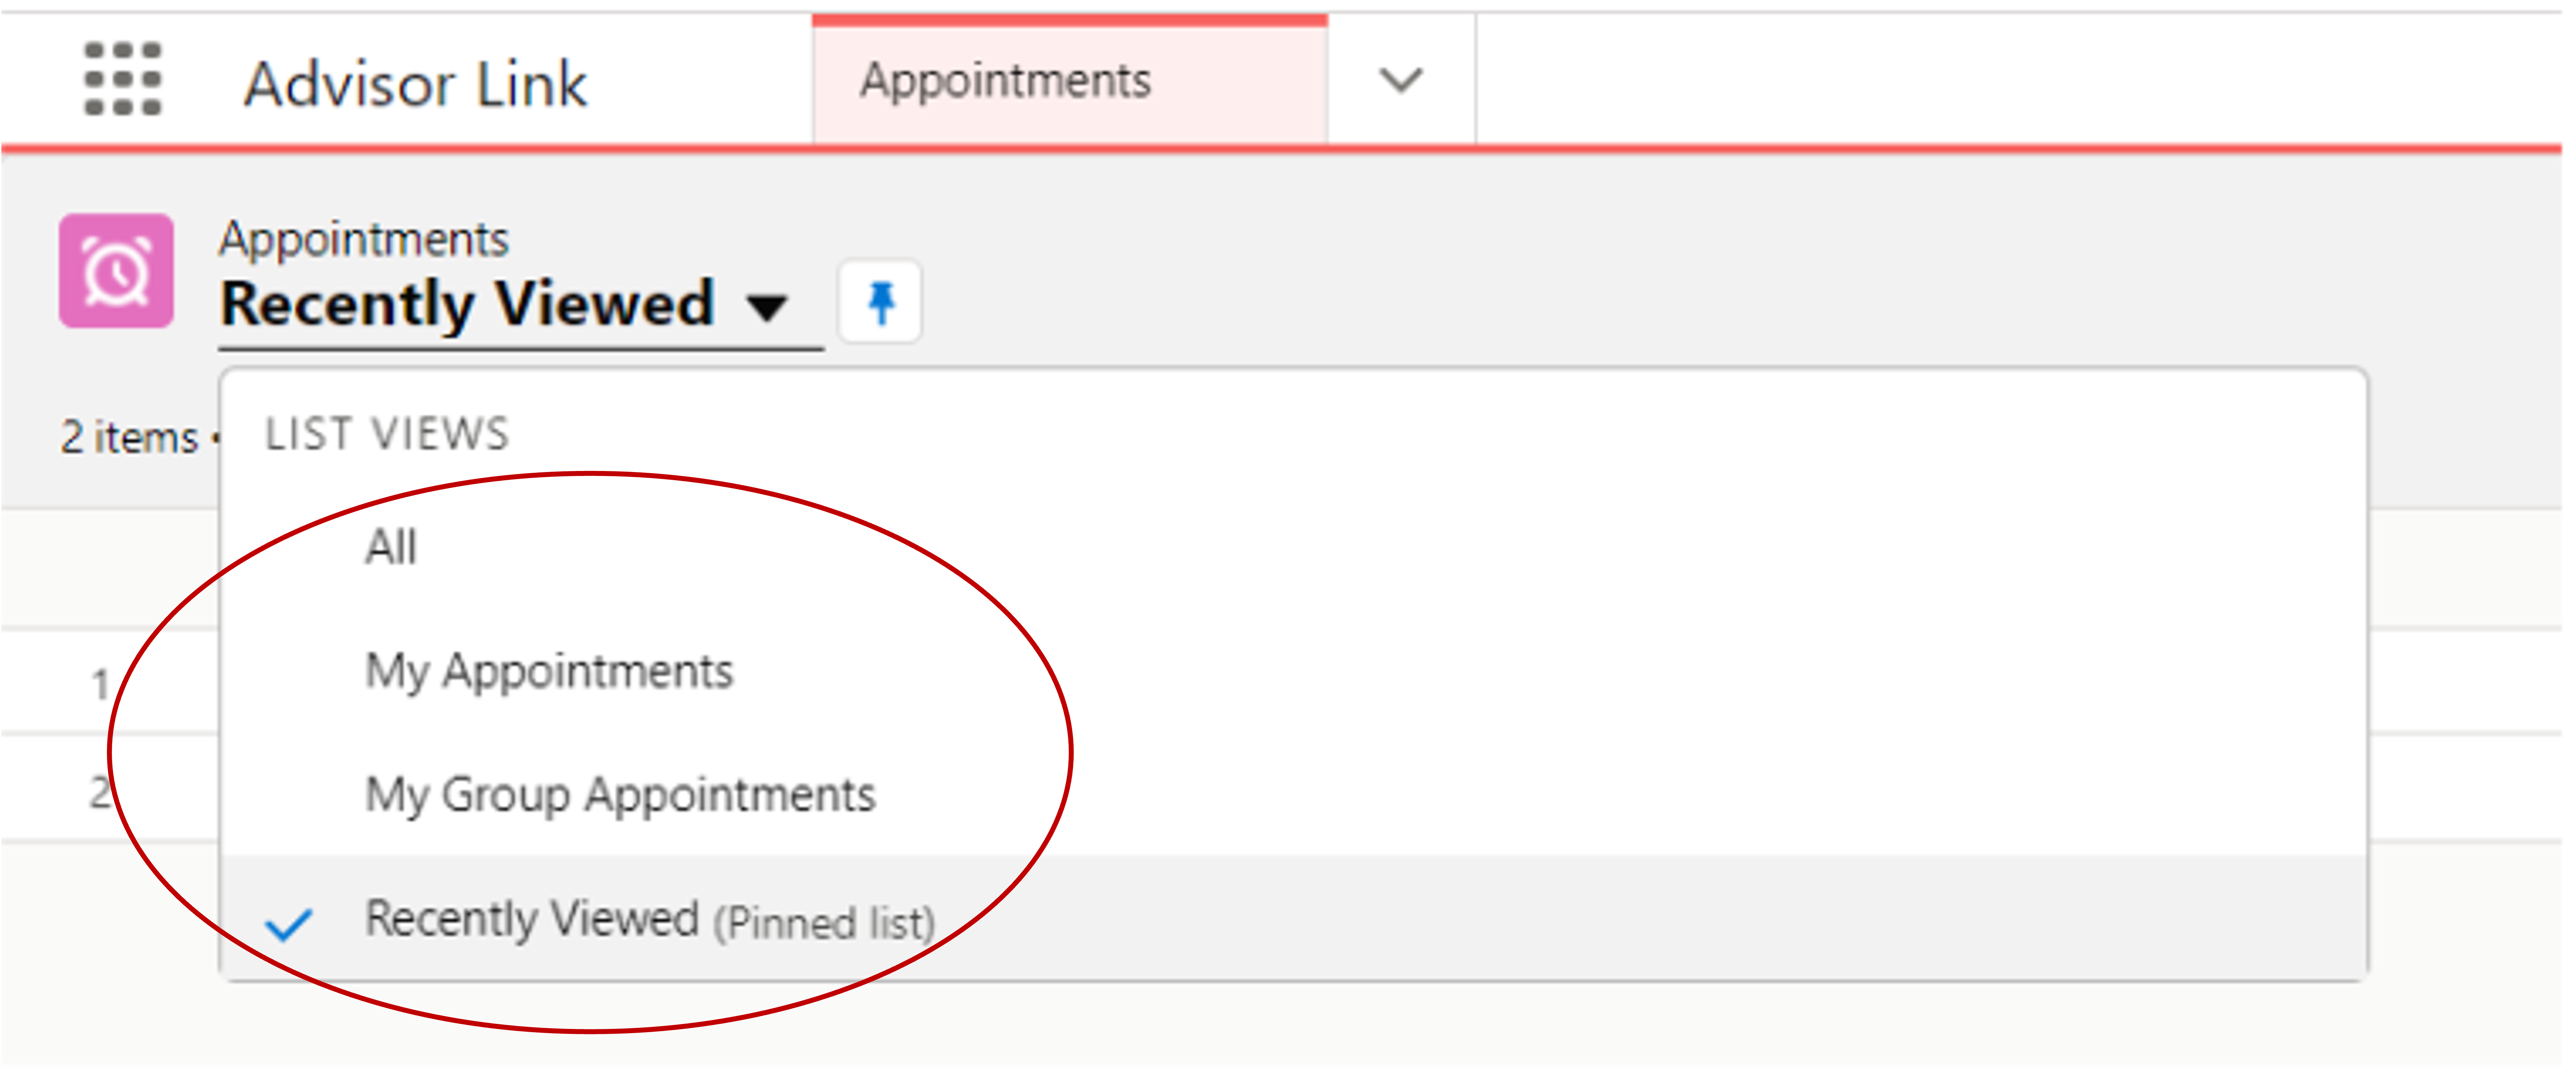
On the Appointments Page, you can select the arrow next to "Recently Viewed" to toggle between "All," "My Appointments," and "My Group Appointments."
View Through the Appointment Manager
Open the Appointment Manager located at the bottom left of the screen and search through the dates of your upcoming appointments. From there, you may locate and select the desired group appointment.
View Through Appointments on an Advisee's Case
Open the Advisee Case for one of the intended appointment attendees and select "Appointments." Then, select the desired group appointment.
How to Edit or Cancel A Group Appointment After the First Student Has Been Scheduled
Adding Attendees to Existing Appointments
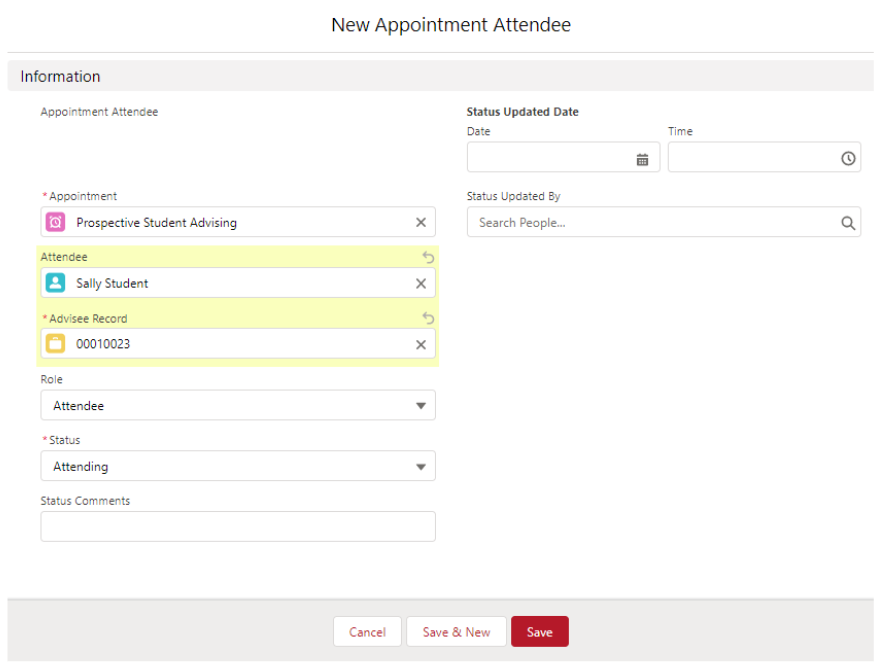
Once you've reached the screen for the desired group appointment, locate the New button on the right side of "Appointment Attendees."

Add the new appointment attendee, making sure to enter the student under the "Attendee" and "Advisee Record" fields. Typing the student's name or UID will initiate the search.
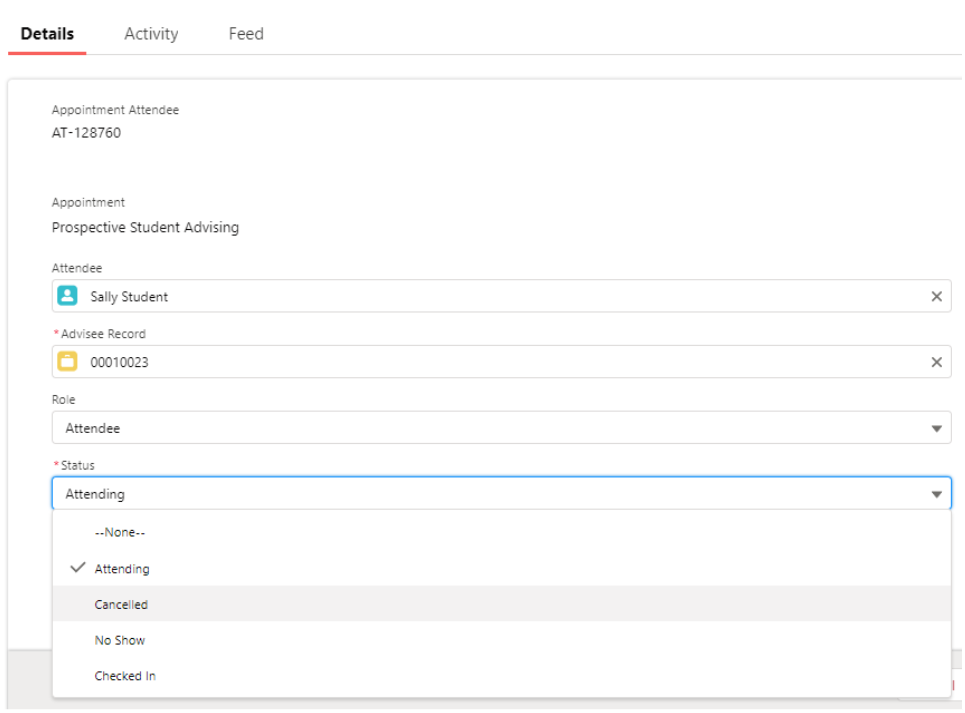
Updating Attendee Status (Canceled, No Show, or Checked In)
You can update the status of an attendee by clicking on them under the "New Appointment Attendee" section. This will open a window where you can edit their status. Then, select the pencil icon to the right of the "Attending" status.
If you wish to cancel a student from an appointment, it is recommended that you update the status instead of using the delete option. Changing a student's status to "Canceled" will trigger an email to the student. Deleting them will not.
How Students Schedule An Appointment
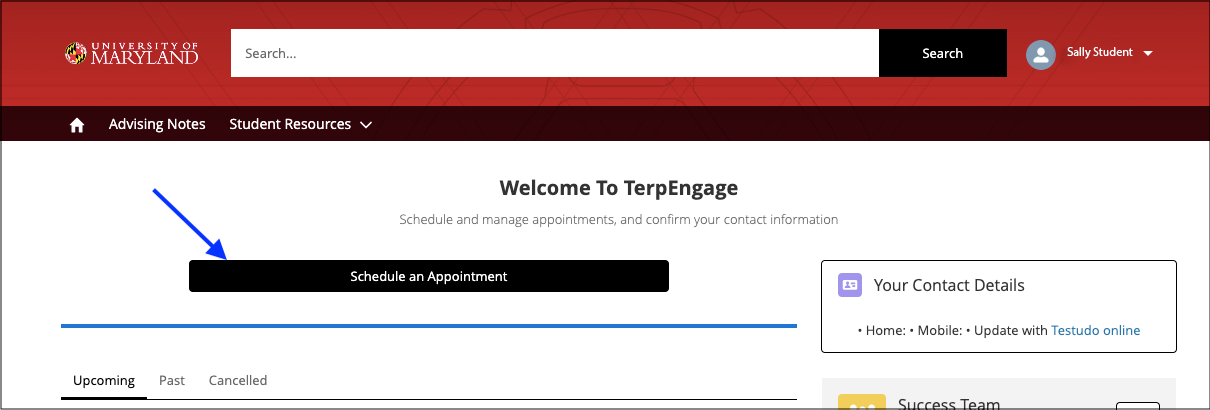
Students have a student portal that they are able to schedule appointments with their Success Team (advisors assigned to them) through. Below is an image of the student's view upon logging in. Students click Schedule an Appointment to schedule an appointment with an advisor.
How Students Schedule With an Advisor not Assigned to Them
Students can schedule an appointment with an advisor that is not assigned to them two different ways. If you have an open advising team, you can direct the student to the open team link to schedule an appointment. The second way is to temporarily add the advisor to the student’s Success Team.