It is suggested that you configure your appointment settings when creating Appointment Availability because appointment settings are used to generate potential appointment slots. Steps about how to configure settings and what each option means can be found below:
-
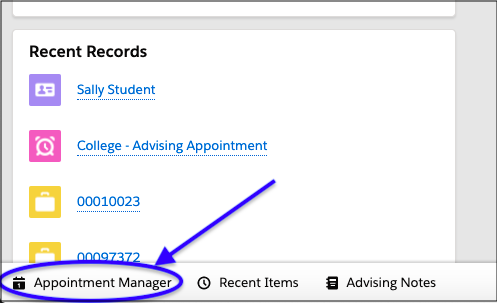
Click Appointment Manager located in the bar at the bottom-left corner of the screen.
-
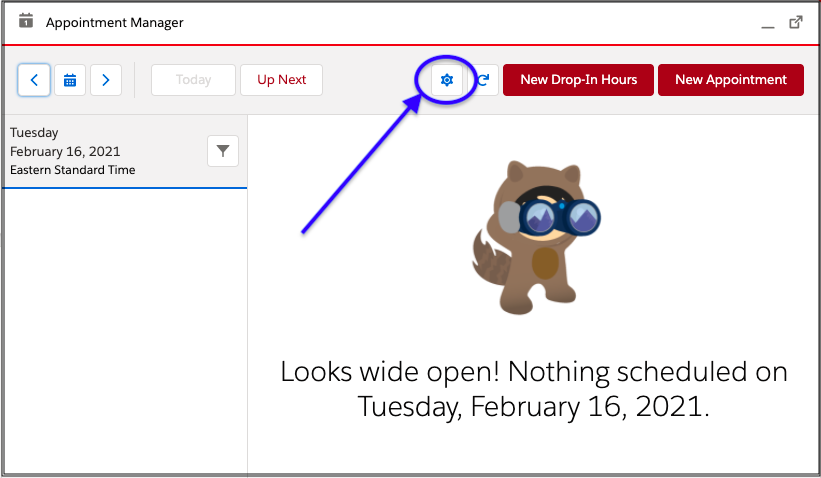
Click the gear icon as shown below.
-
You are now in Appointment Availability Settings.
-
Information about each setting can be found below.
-
Appointment Buffer - An optional field that designates how many minutes to be automatically built in between appointment slots. Most advisors refrain from using any buffer because it significantly limits the number of available appointment slots.
-
Advance Notice - How far in advance a student must schedule an appointment before the meeting start time.
-
Default Appointment Length - The default length (in minutes) of appointment slots generated by Availability. A default appointment length of 30 minutes with no buffer is recommended.
-
Location Settings - These are the location options that will be presented when scheduling any appointment.
-
You can add a location by clicking New as shown below.

-
If adding a virtual location, make sure to paste your personal meeting room URL in the "Meeting Link" field, not a unique meeting URL. It is recommended that you change your personal room settings to allow you to control when someone joins your meeting room to prevent someone from accidentally joining a meeting that is in progress. Information about how to do this -> Zoom / WebEx.
-
-
-
All Recurring Availability, including past Availability, is shown under the “Recurring Availability” heading. Note that Current Availability refers to Availability that includes today’s date.
-
Email Notification Settings associated with Availability are at the bottom of the page. Keep in mind that these settings will apply to all appointments.
-
Click Save when you are done to save the appointment settings.